
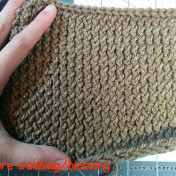
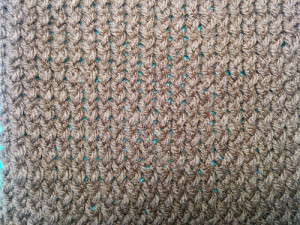
Stitchionary – Twisted Stockinette Stitch (loom knitting)
See all my loom-knit Stitchionary swatch projects here.
Loom Knitting Pattern:
This pattern works for both flat panels and round circular tubes
- Cast on desired number of pegs
- Row 1: ewrap every peg
- Repeat Row 1 until desired length reached
- Bind off
Please note: The e-wrap does NOT make the knit stitch, it produces a different stitch called the twisted knit stitch!
While there is nothing wrong with using the e-wrap to replace knit stitches in your work with twisted knit stitches, your end result will look different than an actual knit stockinette stitch.
Due to ease-of-use, many loom knitters prefer using the twisted knit stitch / ewrap as their default knit stitch. This is fine to do, but the problem is they often write patterns calling this stitch a “knit stitch” when it’s actually a different stitch. Please check your patterns carefully and look for the twist in the finished product image to determine whether they intend to mean “twisted knit”/”ewrap” when they call for “knit” stitches.
True knit, u-wrap, and flat stitch all produce the actual “knit” stitch – they just use different methods that often produce different tensions. This is much like people who needle knit continental style vs english style – they use two different ways to produce the same stitch, but one knitter might prefer one or the other due to comfort, convenience, or more consistent tension.
Because these methods produce the same knitting stitch, you can not tell who used continental needle knitting, english needle knitting, portuguese needle knitting, true knit loom knitting, u-wrap loom knitting, or flat stitch loom knitting — because the end product is always the same stitch. Not true with the e-wrap/twisted knit, because it produces a new stitch that looks different than the actual knit stitch.